Welcome to the White Sewing Machine Manual, your complete guide to operating and maintaining your machine. This manual helps you unlock its full potential, covering setup, operation, maintenance, and troubleshooting for optimal performance.
Overview of the White Sewing Machine
The White Sewing Machine is a versatile and reliable appliance designed for various sewing tasks. With models like the White 967, 664, and 2031, it offers features such as zigzag stitching, automatic needle threading, and adjustable tension. Known for durability, it supports both basic and advanced projects, making it ideal for beginners and experienced sewists. Accessories like extension tables and specialized feet enhance functionality, ensuring adaptability for diverse fabric types and sewing needs. This machine is a trusted tool for creating professional-quality results.
Importance of Reading the Manual
Reading the White Sewing Machine Manual is essential for safe and effective operation. It provides detailed guidance on setup, troubleshooting, and maintenance, ensuring optimal performance. The manual helps users understand machine components, stitch selection, and tension adjustment. By following the instructions, you can prevent errors, extend the machine’s lifespan, and achieve professional-quality results. It’s a crucial resource for both beginners and experienced sewists to maximize their sewing experience and avoid potential damages or accidents.
Safety Precautions and Guidelines
Always read the manual before using your White Sewing Machine. Ensure the machine is placed on a stable surface and keep children away. Unplug the machine when not in use or before cleaning. Avoid wearing loose clothing that could get caught in moving parts. Keep fingers away from the needle and presser foot. Use the correct needle type for your fabric to prevent breakage. Never touch electrical components with wet hands. Follow these guidelines to ensure safe and efficient sewing experiences.

Understanding the Machine Components
The White Sewing Machine features essential parts like the needle, presser foot, and bobbin. These components work together to ensure precise stitching and smooth fabric handling during operation.
Main Parts of the White Sewing Machine
The White Sewing Machine comprises essential components like the needle bar, presser foot, and bobbin case. The spool pins hold the thread, while the stitch selector allows pattern choices. The tension dials regulate thread tightness, ensuring even stitching. The free-arm design enables sewing cuffs and sleeves effortlessly. Understanding these parts is key to mastering the machine’s functions and troubleshooting common issues efficiently.
Accessories and Additional Features
The White Sewing Machine comes with various accessories, including multiple presser feet for specialized tasks like zigzag stitching and buttonholes. Additional features such as an extension table provide workspace for larger projects, while the automatic needle threader simplifies setup. These enhancements ensure versatility and convenience, allowing users to tackle diverse sewing tasks with precision and efficiency, making the machine a versatile tool for both beginners and experienced sewists.
Understanding the Machine’s Control Panel
The control panel is the command center of your White Sewing Machine, featuring intuitive controls for stitch selection, tension adjustment, and operation modes. The stitch selection dial allows you to choose from various pre-set stitches, while the tension dials enable fine-tuning for perfect fabric handling. An LED display provides clear visibility of your settings, and function buttons offer quick access to features like reverse stitching and free-arm sewing. Familiarizing yourself with these controls ensures efficient and precise sewing operations.

Setting Up the Sewing Machine
Unpack and inspect the machine, ensuring all parts are included. Connect the power supply, thread the machine, and wind the bobbin. Follow the manual for proper setup.
Unpacking and Initial Setup
Carefully unpack the White sewing machine, ensuring all accessories are included. Inspect the machine for any damage or defects. Place it on a stable, flat surface, away from direct sunlight. Remove any protective packaging materials and coverings. Refer to the manual for identifying parts and initial setup steps. Plug in the power cord securely, ensuring it’s placed safely to avoid tripping. Before first use, double-check all components are properly aligned and functional. This ensures smooth operation and longevity of your machine.
Connecting the Power Supply
Carefully unpack the White sewing machine, ensuring all components are intact. Locate the power cord and plug it into a nearby electrical outlet. Ensure the cord is securely connected to both the machine and the power source. Avoid using damaged cords or overloaded outlets to prevent safety hazards. Turn the machine on briefly to test functionality. If issues arise, consult the troubleshooting section or contact support. Always follow safety guidelines for electrical connections to ensure safe and reliable operation.
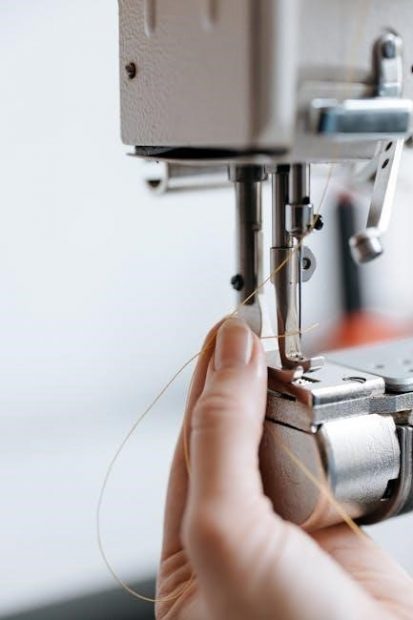
Threading the Machine: Step-by-Step Guide
Begin by raising the presser foot and turning the handwheel to position the needle at its highest point. Gently pull the thread guide to release tension. Insert the thread through the spool pin, then guide it through each designated groove and take-up lever. Leave a small loop at the end and pull the thread gently to seat it properly. Ensure the thread is not tangled or twisted. Refer to the manual for specific threading diagrams if needed. Proper threading ensures smooth stitching and optimal performance.
Winding and Inserting the Bobbin
To wind the bobbin, place it on the winder and pull the thread end through the bobbin’s hole. Hold the thread lightly and press the foot pedal to wind evenly. Once full, cut the thread, leaving a small tail. Insert the bobbin into the bobbin case, ensuring it seats properly. Gently pull the thread to secure it in place. Make sure the bobbin is snug but not over-tightened. This step ensures smooth stitching and prevents thread issues during sewing.

Basic Sewing Operations
Master the fundamentals of sewing with your White machine. Learn to select stitches, adjust settings, and use the free-arm for small projects. Ensure smooth fabric flow and secure seams with ease.
Selecting the Right Stitch Type
Selecting the right stitch type is essential for achieving professional results. The White sewing machine offers various stitches, including straight, zigzag, and decorative options. For general sewing, the straight stitch is ideal for lightweight fabrics, while the zigzag stitch is perfect for stretchy materials. Decorative stitches add a creative touch to your projects. Always refer to the stitch chart in your manual to choose the best option for your fabric type and sewing task. Proper stitch selection ensures strong seams and optimal fabric handling.
Adjusting Tension for Optimal Sewing
Proper tension is crucial for smooth sewing. To adjust the tension, locate the tension dials on the machine. For general sewing, set the upper thread tension to the midpoint. Test the stitches on a scrap fabric; if the stitches are uneven, tweak the dials slightly. Loosen the tension for thicker fabrics and tighten for delicate materials. Always refer to the manual for specific guidance. Correct tension ensures balanced stitches and prevents fabric puckering or breaking.
Using the Free-Arm Sewing Option
The free-arm sewing option allows for greater flexibility and control when sewing small or hard-to-reach areas. To enable this feature, remove the extension table and use the machine’s built-in free arm. This setup is ideal for sewing cuffs, collars, and circular items. Always ensure the fabric is guided smoothly and use the appropriate presser foot for the task. Adjust the machine’s brightness for better visibility and test stitches on scrap fabric before starting your project. Practice makes perfect when mastering this technique.
Reverse Stitching and Securing Seams
Reverse stitching is essential for securing seams, especially at the start and end of a sewing line. To use this feature, press the reverse stitch button or lever on your White sewing machine. This function reinforces the stitches, ensuring durability. It is particularly useful for heavy fabrics like denim or canvas. Always test the reverse stitch on scrap fabric to ensure proper tension. This step is crucial for professional-looking results and prevents seams from unraveling over time.

Advanced Features and Techniques
Explore advanced stitching, automatic needle threading, and customizable settings for enhanced creativity. These features empower sewists to tackle complex projects with precision and efficiency.
Using the Zigzag Stitch Function
The zigzag stitch function allows for versatile sewing, perfect for stretchy fabrics, finishing seams, and decorative edges. To use it, select the zigzag stitch type on the control panel. Adjust the stitch length and width for desired results. For stretch fabrics, use a longer stitch length. For decor, shorter lengths create denser patterns. Guide fabric smoothly, keeping it taut to prevent puckering. Experiment with different settings to achieve professional-looking finishes. This feature enhances both functionality and creativity in your sewing projects.
Sewing Buttonholes: A Comprehensive Guide
Creating professional buttonholes is easy with your White sewing machine. Start by selecting the buttonhole stitch type on the control panel. Use a stabilizer like interfacing to support the fabric. Place the fabric under the needle, aligning the buttonhole marks. Sew one side, then pivot and sew the opposite side. Trim carefully. For consistent results, use the automatic buttonhole feature, which measures and sews evenly. This ensures perfectly aligned and sized buttonholes for a polished finish.
Adjusting the Stitch Length and Width
Adjusting the stitch length and width on your White sewing machine allows for precise control over your sewing. To adjust the stitch length, locate the stitch length dial on the control panel and turn it clockwise for shorter stitches or counterclockwise for longer ones. For the stitch width, use the adjacent dial, turning it clockwise to narrow the stitch and counterclockwise to widen it. Always test these settings on scrap fabric before sewing your final project to ensure desired results. Proper adjustment enhances the quality and appearance of your stitches, making your sewing projects look professional and well-finished.
Using the Automatic Needle Threader
The White sewing machine features an automatic needle threader for convenience and efficiency. To use it, pull the threader lever located near the needle. Guide the thread through the needle eye as the threader automatically loops it. Release the lever to secure the thread. This feature saves time and reduces eye strain, ensuring precise threading every time. Always test the thread tension after threading to ensure smooth stitching and optimal sewing performance.

Troubleshooting Common Issues
This section addresses common problems like the machine not turning on, fabric feeding issues, and tension problems. Identify causes and apply solutions to restore smooth operation quickly.
Machine Not Turning On: Possible Causes
If your White sewing machine won’t turn on, check the power supply first. Ensure the plug is securely connected to both the machine and the outlet. Verify that the outlet is functioning by testing it with another appliance. If using a surge protector, ensure it’s working. Check for a blown fuse or tripped circuit breaker. Also, inspect the power cord for any visible damage or frays. If all these steps fail, the issue may lie within the machine’s internal electrical components, requiring professional servicing.
Fabric Not Feeding Properly: Solutions
If fabric isn’t feeding smoothly, ensure the feed dogs are in the “up” position and not covered by the presser foot. Check that the machine is properly threaded and the bobbin is correctly inserted. Use the appropriate presser foot for your fabric type. Clean lint and debris from the feed dog area to ensure proper movement. If issues persist, adjust the feed dog settings or consult the manual for specific guidance. Proper maintenance and setup are key to resolving feeding problems.
Broken or Bent Needles: Prevention and Replacement
To prevent needle breakage, always use the correct needle size and type for your fabric; Ensure proper threading and avoid sewing at excessive speeds; Regularly clean the machine to prevent lint buildup. If a needle breaks, turn off the machine, press the needle clamp screw, and gently pull out the broken needle. Replace it by inserting a new needle with the flat side facing the correct direction, then tighten the clamp screw firmly. Always handle needles with care to avoid bending or damage.
Tension Problems and How to Fix Them
Tension issues can cause uneven stitches or fabric puckering. Check for improper threading, as this is a common cause. Ensure the bobbin is correctly seated and the thread is evenly tightened. Adjust the tension dials on the machine, starting with the upper thread and then the bobbin. If the problem persists, clean the bobbin area to remove lint. Re-threading the machine and using the correct needle size for your fabric can also resolve tension imbalances. Regular maintenance helps prevent such issues.

Maintenance and Care
Regularly clean the machine to remove lint and debris, ensuring smooth operation. Oil moving parts to maintain performance. Store the machine in a dry, cool place when not in use to preserve its longevity and functionality.
Cleaning the Machine: Best Practices
Regular cleaning is essential for maintaining your White Sewing Machine’s performance. Use a soft brush to remove lint and debris from the bobbin area and tension discs. Gently wipe the exterior with a dry cloth to prevent dust buildup. Avoid harsh chemicals, as they may damage the finish. For internal cleaning, use compressed air carefully to avoid pushing debris further inside. Clean after each project to ensure smooth operation and extend the machine’s lifespan.
Oiling the Machine for Smooth Operation
Regular oiling ensures smooth operation and extends the life of your White Sewing Machine. Use high-quality sewing machine oil, applying a few drops to the bobbin hook and handwheel. Gently turn the handwheel to distribute the oil evenly. Avoid over-oiling, as excess oil can attract lint and dust. Wipe away any excess with a clean cloth. Oil your machine after every 10 hours of use or when you notice friction. This maintains optimal performance and prevents mechanical issues.
Storing the Machine When Not in Use
Proper storage ensures your White Sewing Machine remains in excellent condition. Before storing, clean the machine thoroughly, removing lint and dust. Disconnect the power cord and store it separately. Place the machine in a dry, cool environment, away from direct sunlight and moisture. Use a protective cover to shield it from dust. Avoid leaving accessories attached to prevent damage or rust. Store the machine upright to maintain balance and prevent oil leakage. Regular storage maintenance ensures longevity and optimal performance when you resume use.
Accessories and Attachments
Enhance your sewing experience with optional feet, an extension table, and additional accessories. These tools expand functionality, ensuring precision and ease for various sewing tasks and projects.
Optional Feet for Different Sewing Tasks
Optional feet for your White sewing machine are designed to enhance versatility and precision. The zigzag foot is ideal for decorative stitching, while the zipper foot simplifies zipper installations. The buttonhole foot ensures perfect buttonholes, and the walking foot is perfect for heavy or layered fabrics. Each foot is tailored for specific tasks, allowing you to tackle a wide range of sewing projects with ease and accuracy. These attachments are must-haves for expanding your creative possibilities.
Using the Extension Table for Larger Projects
The extension table is a valuable accessory for handling large sewing projects, such as quilts or drapes. It provides additional workspace, making it easier to manage bulky fabrics. Attach the table securely to ensure stability and alignment with the machine. This accessory reduces fabric drag, allowing for smoother stitching and better control. Ideal for home decor or heavy-duty sewing, the extension table enhances your sewing experience, making large-scale projects more manageable and efficient.
Additional Accessories for Enhanced Functionality
Maximize your sewing machine’s potential with optional accessories designed to enhance productivity and versatility. These include specialized sewing feet for tasks like zigzag stitching, buttonhole creation, and zippers. Additional attachments may offer advanced features such as automatic thread cutters or embroidery options. These tools cater to diverse sewing needs, ensuring precision and efficiency. Explore the range of accessories available to tailor your machine to your unique sewing requirements and expand your creative possibilities.

User Experiences and Tips
Discover real-life feedback and expert advice to enhance your sewing journey. Learn practical tips to avoid common mistakes and maximize your machine’s potential for creative projects.
Common Mistakes to Avoid
- Improper threading can lead to uneven stitches and machine jams.
- Not adjusting tension settings may result in poor stitch quality.
- Using the wrong needle type for specific fabrics can cause damage.
- Neglecting regular maintenance, such as cleaning and oiling, can reduce machine performance.
By avoiding these errors, you ensure smoother operation and extend the lifespan of your White Sewing Machine;
Expert Tips for Getting the Most Out of Your Machine
Maximize your sewing experience with these expert tips for your White Sewing Machine:
- Use the automatic needle threader to save time and reduce eye strain.
- Experiment with different stitch patterns for unique and creative projects.
- Regularly oil and clean the machine to ensure smooth operation.
- Utilize optional feet for specialized tasks like quilting or hemming.
- Test fabric scraps before sewing to ensure proper tension and stitch settings.
These tips will help you unlock your machine’s full potential and enhance your sewing results.
Real-Life Projects and Ideas
Unleash your creativity with practical projects using your White Sewing Machine. Start with simple tasks like hemming clothes or crafting reusable tote bags. Gradually move to more complex ideas such as quilting, making curtains, or sewing custom pillowcases. Use various stitch options to create decorative embroidery or repair garments. With consistent practice, you can tackle intricate designs for gifts, home decor, or personalized accessories. These projects will help you master your machine while producing meaningful items for everyday use.

Frequently Asked Questions (FAQs)
Explore common queries about the White Sewing Machine, covering operation, maintenance, and troubleshooting. Find solutions for issues like thread tension, bobbin installation, and error codes to ensure smooth sewing experiences.
General Maintenance Queries
Regular maintenance ensures your White Sewing Machine runs smoothly. Learn how to clean, oil, and store the machine properly. Discover how to prevent dust buildup and maintain parts lubrication. Understand the importance of routine checks to extend the machine’s lifespan and performance. These simple practices help keep your sewing machine in top condition for years of reliable use.
Troubleshooting Common Errors
Troubleshooting Common Errors
Troubleshooting common errors ensures smooth operation of your White Sewing Machine. If the machine won’t turn on, check the power supply and ensure the plug is securely connected. For fabric feeding issues, clean the feed dogs and ensure they are not damaged. Needle breakage can be prevented by using the correct needle type and avoiding forcing fabric. Tension problems can often be resolved by adjusting the bobbin and thread tension according to the manual. Regular maintenance helps minimize these issues.
Compatibility with Different Fabrics
The White Sewing Machine is designed to work with a variety of fabrics, ensuring versatility for different projects. For lightweight materials like cotton or silk, use the standard stitch settings. Heavier fabrics such as denim or canvas may require a heavier-duty needle and adjusted tension. Delicate fabrics like chiffon or lace benefit from a shorter stitch length and a walking foot accessory. Always test settings on scrap fabric to ensure optimal results and adjust accordingly for the best outcome.

Technical Specifications
The White Sewing Machine Manual details dimensions, weight, and power requirements. Models vary, but most operate efficiently at standard household power. Check specifications for precise measurements.
Machine Dimensions and Weight
White sewing machines vary in size, with models like the 967 measuring approximately 16x7x12 inches and weighing around 15-20 pounds. Compact designs ensure portability without sacrificing durability. Dimensions and weight may differ slightly between models, so checking specific specifications for your machine is recommended. These measurements ensure ease of transport and storage while maintaining robust performance. Always verify your model’s exact dimensions for precise space planning and handling.
Power Requirements and Efficiency
White sewing machines typically require a standard 120V power supply at 60Hz. They are designed for efficient operation, with built-in features to minimize energy consumption. Always use the correct voltage to ensure optimal performance and longevity. For specific models, refer to the manual for exact power requirements. Efficient energy use ensures smooth stitching and reduces operational costs, making White machines both reliable and eco-friendly for sewing enthusiasts.
Warranty and Support Information
Your White sewing machine comes with a comprehensive warranty covering parts and labor for a specified period. Refer to your manual for details on warranty duration and conditions. Dedicated customer support is available to address inquiries and provide assistance. For troubleshooting or maintenance, consult the manual or contact White’s customer service. Warranty terms may vary by model, so ensure to review your specific agreement for accurate information and support options.