Expert Grill Instructions: A Comprehensive Guide
Welcome! This guide provides detailed assembly and operational instructions for your Expert Grill. Ensure safe usage by referencing your model number and following all precautions.
Understanding Your Expert Grill Model
Identifying Your Grill: Your Expert Grill is a versatile outdoor cooking appliance, potentially a 3-in-1 system incorporating a pellet grill, smoker, and propane gas griddle – like the XG1136224169004 model. Locating the model number is crucial; it’s typically found on a label affixed to the inside of the door, the back, or the side of the cart assembly. This number is essential when contacting customer relations at 1-800-913-8999 for parts orders, troubleshooting, or general inquiries.
Key Features & Capabilities: Understanding your grill’s specific features is paramount. Some models are designed for wood pellet fuel, requiring specific types for optimal performance. Others utilize propane gas. Knowing whether your unit includes a smoker box is vital for utilizing smoking capabilities. The griddle top, if present, offers a different cooking surface. Refer to your owner’s manual for detailed specifications related to your particular model.
Intended Use: It’s critical to remember that Expert Grills are designed for outdoor use only. Do not attempt to operate the grill indoors, as this poses significant safety risks. Proper understanding of your grill’s capabilities and limitations will ensure a safe and enjoyable cooking experience.
Safety Precautions Before Assembly
Prioritize Safety: Before commencing assembly, carefully review all safety precautions. Expert Grill appliances involve gas, electricity (for ignition systems), and hot surfaces – demanding respect and caution. Ensure the assembly area is clear, level, and well-ventilated. Keep children and pets away from the work space to prevent accidental injury.

Read the Manual: Thoroughly read the owner’s manual. It contains vital safety information specific to your model. Pay close attention to warnings regarding propane tank handling, electrical connections, and proper ventilation. Ignoring these warnings could result in fire, explosion, or carbon monoxide poisoning.
Protective Gear: Consider wearing safety glasses and work gloves during assembly to protect your eyes and hands from potential hazards. Be mindful of sharp edges on metal components. If you encounter any damaged parts, do not proceed with assembly; contact Expert Grill Customer Relations at 1-800-913-8999 for replacements. Never modify the grill in any way, as this could compromise its safety features.
Emergency Preparedness: Know the location of your nearest fire extinguisher and how to use it.
Unboxing and Inventory of Parts
Careful Unboxing: Upon receiving your Expert Grill, carefully unpack all components. Avoid using sharp objects that could damage the parts. Inspect the carton for any signs of shipping damage. If damage is evident, immediately document it with photographs and contact the retailer or Expert Grill Customer Relations at 1-800-913-8999.
Parts List Verification: Refer to the parts list included in your owner’s manual. Systematically compare each item in the box against the list. This ensures you have all necessary components before beginning assembly. Note the model number, often found on a label inside the door, back, or side of the cart assembly, as you may need it when contacting customer support.
Organization is Key: Lay out all parts on a protected surface (cardboard or a drop cloth) to prevent scratches. Group similar components together – for example, all screws, bolts, and washers. This will streamline the assembly process. Identify and separate the burner components, heat plates, and grates. If any parts are missing, do not attempt to substitute them; contact Expert Grill for replacements.
Step-by-Step Assembly Instructions ⸺ Base & Cart
Foundation First: Begin by assembling the base frame. Typically, this involves connecting leg supports to the main cart frame using bolts and washers – refer to your manual’s diagrams for specific hardware. Ensure all connections are snug, but avoid over-tightening at this stage. This allows for adjustments later.
Cart Construction: Next, attach the side panels and back panel to the base frame. Align the pre-drilled holes carefully and secure with the provided screws. Double-check that the cart is square and level before fully tightening all fasteners. A level cart is crucial for stable grilling.
Wheel Installation: Install the wheels or casters to the base of the cart. Ensure they are securely fastened and rotate freely. Lockable casters are highly recommended for added stability, especially on uneven surfaces. Finally, attach any lower shelves or storage compartments to the cart frame, following the illustrated steps in your owner’s manual. Remember to select an appropriate area for assembly!
Attaching the Grill Body to the Cart
Careful Lifting: With the cart fully assembled, carefully lift the grill body onto the prepared base. This step often requires two people to prevent damage or injury. Align the mounting points on the grill body with those on the cart frame – these are usually pre-drilled holes or designated brackets.
Secure Fastening: Secure the grill body to the cart using the bolts, screws, or other fasteners provided. Ensure these are tightened firmly, but avoid over-tightening, which could strip the threads or warp the frame. Double-check the alignment to ensure the grill sits squarely on the cart.
Stability Check: Once secured, thoroughly check the stability of the entire unit. Gently rock the grill to ensure it doesn’t wobble or feel unstable. If any movement is detected, re-tighten the fasteners or adjust the alignment as needed. A stable connection is paramount for safe operation. Refer to your model number for specific guidance!
Installing the Burners and Heat Plates
Burner Placement: Carefully position the burners within their designated slots inside the grill body. Ensure they are seated correctly and that the gas inlet connections align properly. Avoid forcing the burners; gentle pressure should suffice. Incorrect placement can lead to uneven heating or gas leaks.
Securing the Burners: Secure the burners using the provided screws or clips. Tighten these fasteners to hold the burners firmly in place, but again, avoid over-tightening. A secure fit is crucial for consistent performance and safety.
Heat Plate Installation: Place the heat plates (also known as flame tamers) above the burners. These plates distribute heat evenly and protect the burners from dripping grease. Ensure they are correctly positioned to cover the burners adequately. Proper heat distribution is key to successful grilling. Consult your owner’s manual for specific burner and heat plate configurations related to your model number.
Connecting the Propane Tank
Safety First: Before connecting the propane tank, ensure the grill burners are turned off and the ignition is set to the “off” position. Always connect in a well-ventilated area, away from any open flames or sources of ignition. Inspect the propane tank for any signs of damage or corrosion before proceeding.
Regulator Connection: Carefully attach the propane tank regulator to the propane tank valve. Hand-tighten the connection securely, ensuring a snug fit. Do not use tools to tighten, as this could damage the regulator or valve. A proper seal is vital to prevent gas leaks.
Leak Test: After connecting, perform a leak test. Mix a solution of soapy water and apply it to the connection point. If bubbles appear, there is a leak. Immediately turn off the propane tank and tighten the connection further. Repeat the leak test until no bubbles are visible. Never use a flame to check for leaks!
Wiring the Ignition System
Caution: Disconnect the propane tank before working on the ignition system to prevent accidental ignition. The ignition system ensures safe and convenient starting of your Expert Grill. Carefully follow these steps to ensure proper wiring and functionality.
Connecting the Wire: Locate the ignition module and the burner ignition wires. Connect the wire from the ignition module to the designated terminal on each burner. Ensure the connections are secure and free from corrosion. A loose connection can prevent ignition.
Grounding Wire: Attach the grounding wire to the designated grounding point on the grill frame. Proper grounding is crucial for electrical safety. Verify that the grounding wire is securely fastened and free from damage.
Testing the Ignition: After wiring, reconnect the propane tank (slightly open the valve). Turn the burner control knob to the “high” setting and press the igniter button. The burner should ignite immediately. If it doesn’t, recheck all connections and repeat the process. If issues persist, contact customer support at 1-800-913-8999.
Assembling the Smoker Box (If Applicable)
If your Expert Grill model includes a smoker box, assembly is straightforward but crucial for optimal smoking performance. Begin by identifying all components of the smoker box – typically a box-shaped container, a lid, and potentially a slide vent. Refer to your owner’s manual for a parts list specific to your model (XG1136224169004).
Positioning the Box: Place the smoker box directly over a burner, ensuring it’s securely seated. Some models may have designated slots or supports. The placement influences smoke distribution, so align it according to the manual’s instructions.
Adding Wood Pellets: Fill the smoker box with your preferred wood pellets. Use only wood pellets specifically designed for smokers; other fuels are not recommended. Do not overfill – leave space for airflow.
Securing the Lid: Place the lid on the smoker box, ensuring a snug fit. The lid helps regulate smoke output and maintain consistent temperatures. Adjust the slide vent (if present) to control airflow and smoke intensity. Remember, this appliance is not for indoor use.
Setting Up the Griddle Top (If Applicable)
For Expert Grill models featuring a griddle top, proper setup is essential for even cooking and easy cleanup. Begin by carefully lifting the griddle top and positioning it onto the grill body, ensuring it’s securely seated on the designated mounting points. Refer to your owner’s manual (model XG1136224169004) for specific placement instructions, as variations exist between models.
Securing the Griddle: Most griddle tops utilize a locking mechanism or tightening knobs to ensure stability during use. Double-check that the griddle is firmly attached before proceeding. A wobbly griddle can lead to uneven heating and potential safety hazards.
Seasoning the Griddle: Before first use, it’s crucial to season the griddle top. Apply a thin, even coat of high-heat cooking oil across the entire surface. Heat the griddle on medium-high for approximately 15-20 minutes, allowing the oil to polymerize and create a non-stick surface.
Cleaning Considerations: Regularly clean the griddle top after each use to prevent buildup and maintain optimal performance. Avoid abrasive cleaners that could damage the surface.
Initial Burn-In Procedure
Before your first full cookout with your Expert Grill, performing an initial burn-in procedure is vital. This process eliminates any residual manufacturing oils or contaminants and helps season the internal components for optimal performance. Begin by ensuring the grill is situated outdoors in a well-ventilated area, away from flammable materials.
Ignition and Heating: Open the lid and ignite all burners on the highest setting. Allow the grill to run at this high heat for approximately 30-45 minutes. This extended heating period will burn off any remaining residues. You may notice some initial smoke or odor – this is normal.

Monitoring and Adjustment: During the burn-in, closely monitor the grill for any unusual noises or malfunctions. If anything seems amiss, immediately turn off the gas supply and consult the troubleshooting section of your owner’s manual (model XG1136224169004).
Cool Down: After the burn-in period, turn off all burners and allow the grill to cool completely before proceeding to cleaning and seasoning the grates. This initial step ensures a safe and flavorful grilling experience.
Cleaning and Seasoning the Grates
Following the initial burn-in, thoroughly cleaning and seasoning your Expert Grill’s grates is crucial for preventing food from sticking and ensuring even heat distribution. Begin by using a grill brush – preferably one with stainless steel bristles – to remove any remaining residue from the burn-in process. Warm grates are easier to clean, but ensure they are not excessively hot to avoid injury.
Cleaning Process: For stubborn residue, create a solution of warm, soapy water and gently scrub the grates. Avoid abrasive cleaners, as they can damage the grate’s surface. Rinse thoroughly with clean water and allow to dry completely.
Seasoning the Grates: Once dry, it’s time to season. Apply a thin, even coat of high-smoke-point cooking oil (such as canola or vegetable oil) to the grates. Use a paper towel to wipe away any excess oil – you want a light coating, not puddles.
Final Heating: Turn all burners to medium-high heat and allow the grates to heat up for approximately 15-20 minutes. This process polymerizes the oil, creating a non-stick surface ready for your first cook. Repeat seasoning periodically for optimal results.
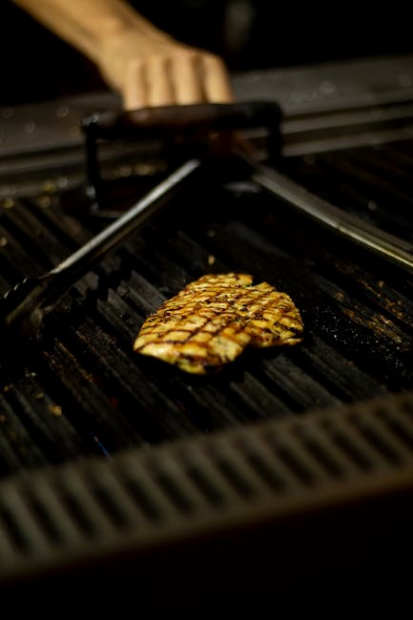
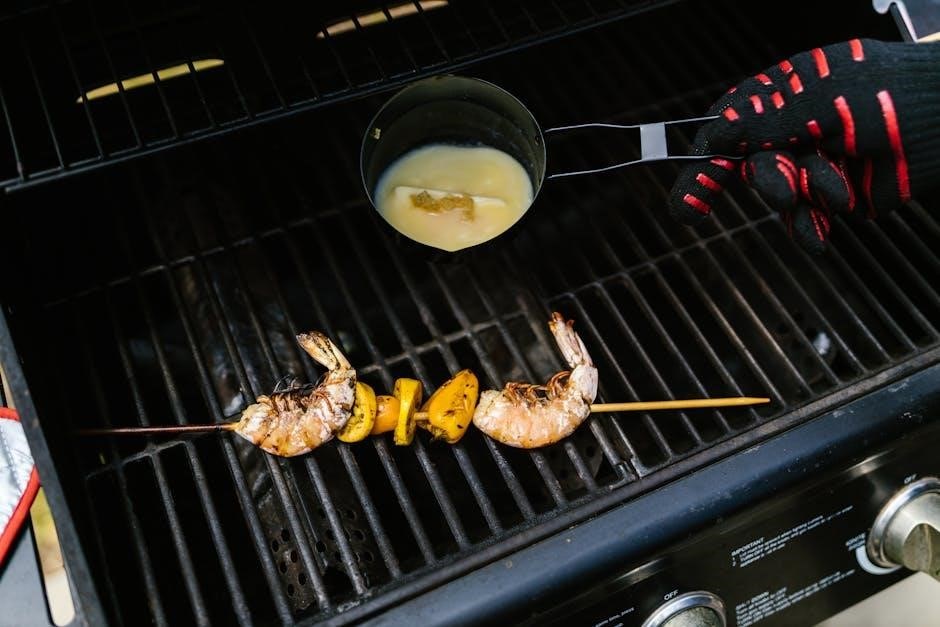
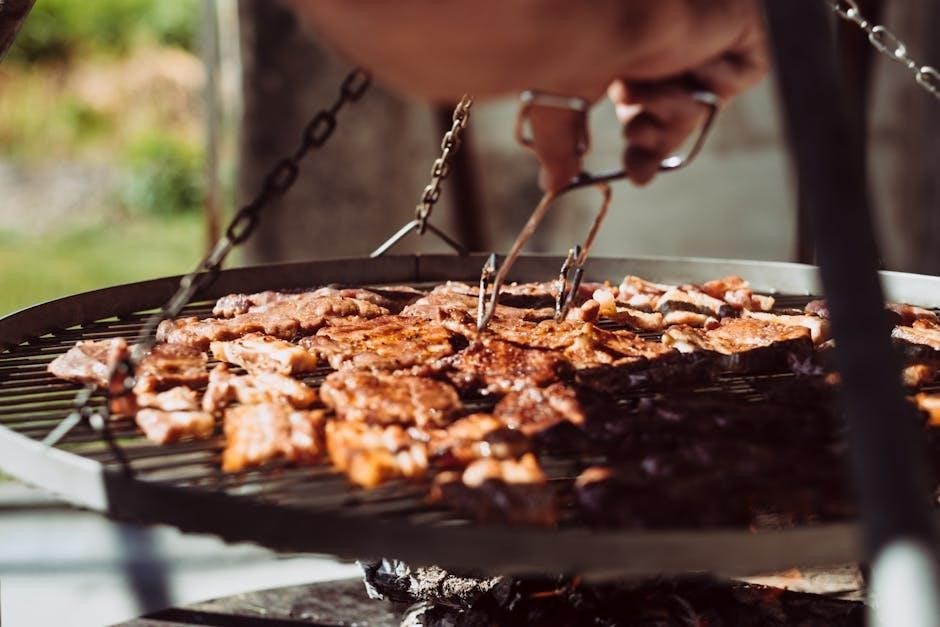
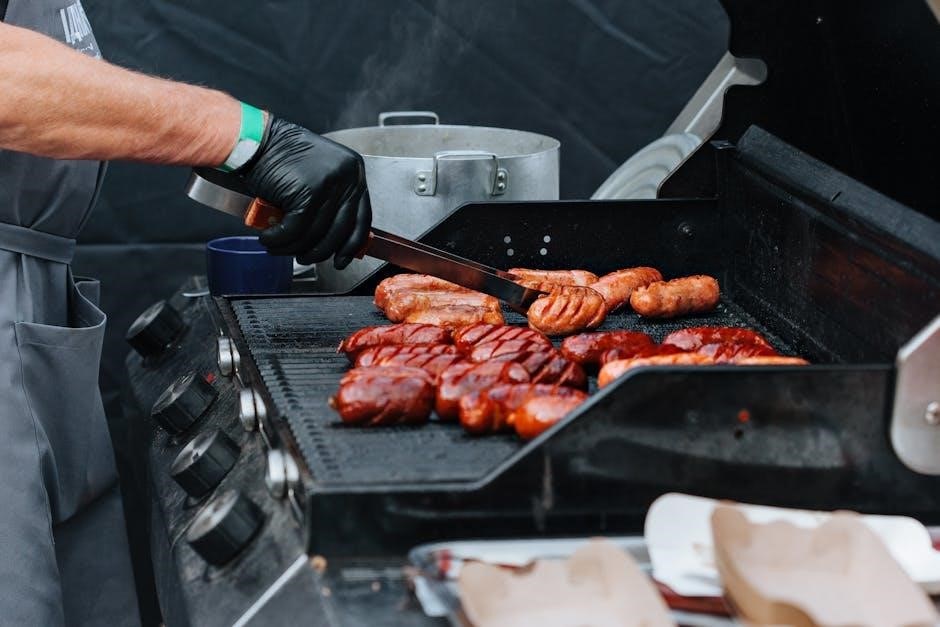
Operating Instructions ─ Grilling Mode

To begin grilling, ensure the Expert Grill is properly assembled, the propane tank is securely connected, and the burners ignite smoothly. Open the lid before igniting the grill to prevent gas buildup. Turn the control knobs to the desired burner(s) and press the ignition button. If the burner doesn’t light, consult the troubleshooting section.
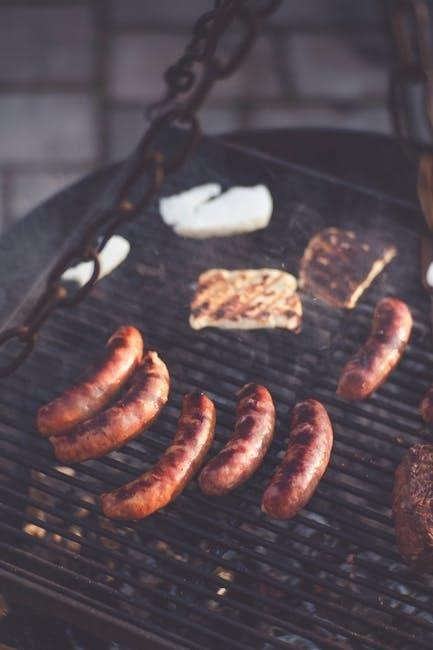
Temperature Control: Adjust the burner control knobs to achieve your desired grilling temperature. Lower settings are ideal for delicate foods like fish, while higher settings are suitable for searing steaks. Utilize the grill’s lid thermometer for accurate temperature monitoring.
Food Placement: Arrange food on the grates, leaving space between items for even cooking. Avoid overcrowding the grill, as this can lower the temperature and result in unevenly cooked food. Close the lid to maintain consistent heat and promote faster cooking.
Monitoring & Adjusting: Regularly check the food and adjust burner settings as needed. Use grilling tools to flip and rotate food for even browning. Remember to always practice safe grilling habits and never leave the grill unattended.
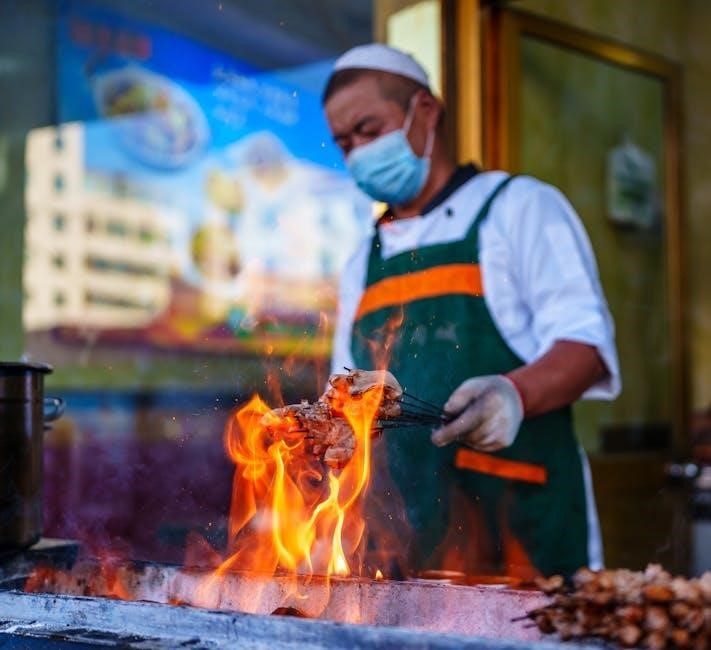
Operating Instructions ─ Smoking Mode
For smoking, your Expert Grill requires specific wood pellet fuel – verify compatibility with your model. Ensure the smoker box (if applicable) is filled with wood pellets. Ignite the grill using the standard procedure, then reduce the burner settings to their lowest level. The goal is to maintain a consistent, low temperature, typically between 225°F and 275°F.
Smoke Generation: The wood pellets will smolder, producing smoke that infuses the food with flavor. Monitor the smoke output and add more pellets as needed to maintain a consistent smoke level. Avoid using excessive pellets, as this can create a bitter taste.
Temperature Stability: Maintaining a stable temperature is crucial for successful smoking. Use the grill’s thermometer and adjust the burner settings accordingly. Patience is key – smoking takes significantly longer than grilling.
Food Placement & Monitoring: Place the food on the grates, away from direct heat. Monitor the internal temperature of the food using a meat thermometer. Remember to replenish wood pellets and maintain consistent temperature throughout the smoking process.
Operating Instructions ⸺ Griddle Mode
If your Expert Grill features a griddle top, ensure it’s properly installed and seasoned before first use. Begin by preheating the griddle on medium-high heat for approximately 10-15 minutes. This ensures even heat distribution across the cooking surface.
Greasing the Griddle: Lightly grease the griddle surface with a high-smoke-point oil, such as vegetable or canola oil. This prevents food from sticking and promotes even cooking. Use a spatula or scraper to spread the oil evenly.
Cooking on the Griddle: Once preheated, you can begin cooking. Griddles are ideal for pancakes, bacon, eggs, burgers, and vegetables. Adjust the burner settings as needed to control the cooking temperature.

Cleaning During Use: Use a metal spatula to scrape away any food residue while cooking. This keeps the griddle surface clean and prevents burning. After cooking, allow the griddle to cool slightly before cleaning thoroughly with a scraper and oil.
Troubleshooting Common Issues
Ignition Problems: If the igniter doesn’t spark, check the battery and wiring connections. Ensure the gas supply is open. If issues persist, manually light the burners following the instructions in your owner’s manual. Contact customer relations at 1-800-913-8999 for assistance.
Uneven Heating: Uneven heating can result from blocked burners or uneven fuel distribution. Clean the burners thoroughly and ensure proper propane tank pressure. Check for obstructions within the grill body.
Temperature Fluctuations: Temperature fluctuations may occur due to wind or insufficient fuel. Shield the grill from wind and maintain adequate propane levels. Adjust burner settings for consistent temperatures.
Griddle Sticking: If food sticks to the griddle, ensure it’s properly seasoned and greased. Lower the cooking temperature and use a metal spatula to prevent sticking. Refer to the griddle mode operating instructions for detailed guidance.
For any unresolved issues, do not attempt repairs yourself. Contact Expert Grill Customer Relations for professional support.
Maintenance and Long-Term Care
Regular Cleaning: After each use, thoroughly clean the grates, burners, and grease trap. Use a grill brush and warm, soapy water. Avoid abrasive cleaners that can damage surfaces. Inspect burners for blockages and clear as needed.
Seasoning the Grates: Regularly season the grates with cooking oil to prevent rusting and food sticking. Apply a thin coat of oil after cleaning and heat the grill to help it bond. This ensures optimal cooking performance.
Propane Tank Care: Store propane tanks in a well-ventilated area, away from heat sources. Regularly check for leaks using a soapy water solution. Replace tanks when empty or damaged.
Long-Term Storage: Before long-term storage, thoroughly clean the entire grill and cover it with a protective grill cover. Store in a dry, sheltered location. Disconnect the propane tank for safety.
For parts or assistance, contact Expert Grill Customer Relations at 1-800-913-8999. Proper maintenance extends the life of your grill and ensures enjoyable outdoor cooking experiences.